On my previous post I described how you can onboard an Azure subscription or management group to Azure PIM (Privileged Identity Management) so that you start creating conditional access for Azure resources. In this post I am going to go through an example on how to control access to a particular resource.
Pre-requisites
You will need to have onboarded the subscription or management group that contains the resources that you wish to configure access. You will need “Owner” or “User Access Administrator” role permissions on the resource(s) that you wish to configure.
- Login into https://portal.azure.com. Use the search bar to find "Azure AD Privileged Identity Management"

- Under “Azure AD Privileged Identity Management” blade click “Azure Resources”

- By default, you will only see the subscriptions and if you wish to assign permissions at other levels then you will need to select filter “Resource Type” Please note ensure you have sufficient privileges to see the resources (Need to have “owner” or “User Access Administrator” roles)

- Once you selected filter "Resource Type" you have options to select which resource type to show

- As we selected the filter to just show resource, resource group and subscription you can now see all the resources listed based on the permissions I have. We will select “rg-ppe” resource group to be configured

- The overview page shows some general statistics about any PIM activities, who might have activated a role at “rg-ppe” resource group, etc. To start configuring PIM for this resource group, select “Assignments”

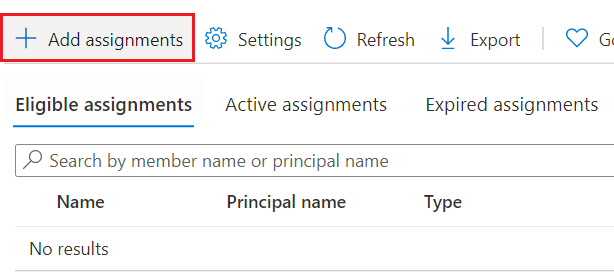
- The default view will show if you have any “eligible” assignments that have already been configured at this level or inherited. As we are going to create a new assignment we will select “Add assignments”

- On “Add Assignment” screen, check under Membership to confirm you have selected the right resources and resource type. Now under “Select role” you will decide which built-in Azure or custom role you would like to assign for this resource group

- I have selected the “reader” role. Next under “select member(s)” click “no member selected”. Add the users or group that you would like to be eligible for this role

- Check you have selected the right role and member(s) for this role then “Next” to continue

Select if you would like the role to be “eligible” or “active”. Eligible means members of this role have to perform one or more actions before they can use the role. An example could be they are required to use MFA or provide a ticket number. Active means members of this role do not need to perform any actions and are always assigned this role. We will be selecting “eligible” and with this assignment type you have an option to adjust the start and end date/time for this role. Example, a new contractor has been hired for six months (Jan-June). The contractor is expected to do some work on the resources under our “rg-ppe” resource group between Mar-Apr. We can adjust the start and end date to be between Jan-June or we can be more specific and have it start Mar-Apr. By further restricting it the contractor will only see it available during the assignment time/date. We will leave it as default of a year and click “Assign”

Under “Eligible assignments” you should see the “Reader” role and the users and groups we have assigned for this role. Right now, the role will have the default access control to activate the role. To make changes we need to the access policy click on “settings”

- On the settings screen search for the role that you would like to change. If under “Modified” column you see “Yes” it means the default settings has been modified already. We are going to select “Reader” as this is the one we are working on for this example

- First check that we are modifying the right resource and role at the top. This page will show the current settings and to edit click on “edit”

- Under “Activation” tab we will make a change to “activation maximum hour” which at default is set to 8 hours. I will change it to “1”. Select “Update” but if there are other settings then click the other two tabs (Assignment or Notification)


- I will login with the user “Yuna” and navigate to Privileged
Identity Management page and select “My roles”

- By default it will be on Azure AD Roles so click on “Azure Resources”

- You will see under “Eligible” what roles you have been assigned, which resource the role has been set at and the end time. Click “Activate” to start the process

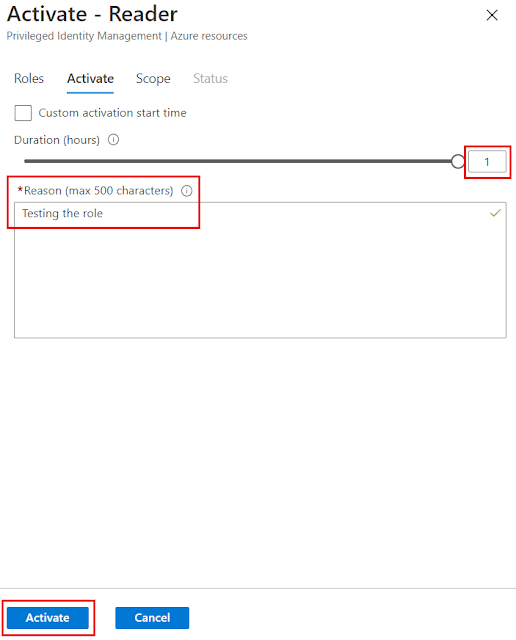
- You will now see the maximum hour that I can select is "1" and I have to state a reason why I want to activate the role. Once some text has been entered click “Activate”
- Wait for the role to be activated which you can see is a three-stage process. Once completed the browser should refresh but you may need your credentials again if prompted

- Screen will refresh back to "Eligible assignments" tab. Click on "Active assignments" to see that you role is active and you can see end time and a option to "Deactivate" the role before the end time


